Courtesy of Craigslist and my wonderful in laws for driving them to us! They're Kent Moore brand, and seem to be of great quality. Not to mention we have TONS of them. The best part? They turned out to be from a home just 2 doors down from my in laws! Small world, huh?
Sunday, October 9, 2011
Below the Surface
Under the carpet in the addition we found linoleum tiles. Luckily, they came up fairly easily with a floor scraper and some elbow grease. :) This is, along with removing panelling are what Laura and I focused on our recent weekend with my family.
First Things First
Foundation repair looked a little something like this:
And about 5 G later we have ourselves a solid slab and a nice warranty to back it up.
While we're talking about "first things," Andrew also made it a priority to do away with this swarming mass of wasps and a few other nests in the backyard. Yes. Crisis avoided.
And about 5 G later we have ourselves a solid slab and a nice warranty to back it up.
While we're talking about "first things," Andrew also made it a priority to do away with this swarming mass of wasps and a few other nests in the backyard. Yes. Crisis avoided.
CabiNOT.
Yeah, we really hated the cabinet over the peninsula. Visually, it really closed off the kitchen. So here we are Andrew is doing away with it! WOO!
Before:
After:
Before:
After:
 |
| Tada! SO much better! :) |
No more pad in our pad
Yep, we took out all the carpet. And it was DISGUSTING. Here's a looksie.
 |
| Roll em up, move em out! This stuff was HEAVY! Cutting it into smaller chunks with a utility knife was muy smart. |
 |
| We piled all the carpet up in the garage and hauled it off. |
 |
| Time for the next laod! |
 |
| Remember, we're doing this renovation for as little mullah as possible, so renting a big construction dumpster when we can easily haul things off ourselves? No way! |
We learned our lesson pretty quick. A couple taps of the nail on either side with a hammer seemed to loosen it from the hole so that once you were able to pop it out, it didn't take so much concrete with it. See?
 |
| Much better. |
I did quite a bit of research before pulling out the carpet grabber because at this point we were considering stained/polished concrete floors and I didn't want big old divets or mismatched concrete patches around the corner. When it came down to it though our only other option would have been grinding down the nails so that they were flush with the concrete and that, my friends, sounded like puke in a jar. You heard me right. Plus, we didn't own a grinder...
A few more pics of the process:
 |
| Pile of carpet grabber. |
 |
| Don't let that smile deceive you. This is so far my least favorite renovation project. |
Our fixer upper: The "Before"
The short of is that we found it at a great price- it was an estate being liquidated by the previous owners' heirs. It's ranch-style house built in the late 1950's and we're the second owners. It needs A LOT of work and we have about 5 months to make it livable. Well, 5 months from closing. Now it's more like 3 months... Anyway, lots to do. We're pretty excited about it! And only slightly overwhelmed. :)
Here's to hoping this will be a place we can share some of the joys and struggles that we have in this new project! :)
Below are the pics we found when we were house shopping.
Here's to hoping this will be a place we can share some of the joys and struggles that we have in this new project! :)
 |
| Basic layout. The L side of the house isn't really drawn out... there are 3 bedrooms and 2 baths over there. :) |
Below are the pics we found when we were house shopping.
 |
| Nice curb appeal, right? ;) Oh, and the garage is 2-car...it's cut off. |
 |
| Living room. View from the eat in kitchen. |
 |
| Living room view to the eating area of the kitchen and the hallway that leads to the bedrooms and bathrooms. |
 |
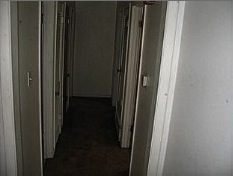
| Hallway to bedrooms and bathrooms. |
 |
| Master bedroom. |
 |
| Hall bathroom. |
 |
| Master bedroom. |
 |
| Master bathroom. |
 |
| Largest bedroom. |
 |
| Kitchen. |
 |
| Kitchen. View from the addition. |
 |
| Kitchen. Rockin' a window to the addition. |
 |
| Kitchen. View from laundry area. |
 |
| Laundry area. Addition to the left. Pantry and door to the garage to the right. |
 |
| Stove top. |
 |
| Pantry. |
Subscribe to:
Comments (Atom)


